Showing posts with label Hair Tips. Show all posts

10/2/11

The Benefits of Black Tea


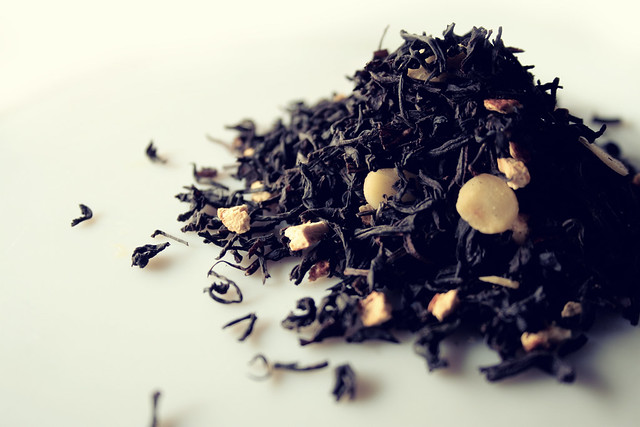
The Black Tea we drink deserves some more credit. Black Tea is not only rich in antioxidants, but it's also great for our hair, skin and health. Black tea contains ten times more antioxidants than found in fruits & vegetables. Since Black Tea comes from the same Camellia Sinensis plant as does all tea, we can expect it to have similar benefits like green & white teas. A lot of research has been done on the health benefits of green tea. Due to this reason, many consider green tea to be more beneficial than Black Tea. However, this isn't necessarily so. Recent studies have shown that there are a number of benefits of Black Tea. Some of the health benefits of Black Tea are as follows: 
  • Black Tea is specially useful for those suffering from diabetes, as it's known to lower the level of glucose in the blood. 
  • Black Tea is said to help one cope with stress better by controlling the level of hormones in the body. 
  • Black Tea expands the air passages. Hence, it facilitates breathing in those who suffer from asthma. 
  • Black Tea increases metabolism & helps burn fat faster. 
  • Black Tea is known to have anti-aging properties. 
Benefits of Black Tea for Hair:
  • Contains more caffeine than a cup of coffee, which caffeine inhibits DHT (a hormone that is responsible for hair loss). 
  • Known to reduce shedding & breakage 
  • Can increase the thickness of your hair 
  • Can darken the hair or enhance natural highlights
  • Can add shine, luster and softness to the hair
If you are considering incorporating Black Tea into your daily regimen, here's a few starters:
  • Use Black Tea as a Herbal Rinse. Apply Rinse after shampooing, rub into scalp & leave in. Some naturals do a Final Rinse. Some move on to applying Leave-In. It's up to you. 
  • Add Black Tea to your ACV Rinses, or even substitute the ACV Rinse with the Black Tea Rinse. 
  • Add some Black Tea to your daily moisturizers.
Follow POH on Twitter | Like POH on Facebook | Subscribe to POH on YT

The Art of Saving Money with Homemade Recipes


I know my project junkies will agree -- you can spend hundreds of dollars testing out numerous products available on the market, many of which are supposedly intended for natural hair use. However, breaking the bank shouldn't be a necessity for healthy, strong natural hair. I know one of the big factors for me going natural was to actual save money -- no more having to take weekly trips to the salon, no more having to buy expensive packs of Remy hair.. goodbye to all of that. I'll admit.. I've spent a few bucks here & there purchasing new products to try, but usually all my key ingredients needed for my hair are right in my own kitchen. 

Creating your own hair recipes not only keeps money in your pocket, but it allows for a more intimate relationship with your hair. You now gain a much better insight as to what your hair craves, prefers or rejects with your at-home experiments. When I'm bored, I like to get creative. So I want to share with you ladies a few tips to finding your own perfect hair concoctions:
  • Don't mix too many things at once. I personally like the start with simple recipes. This way it's much easier to determine what works & what doesn't when your ingredient list is limited. 
  • Try starting out with two-ingredient mixes until you find a mix that works well on your hair. When I first went natural, I already had two ingredients I felt could get me started along my natural hair journey: Water + EVOO. I mixed the two & used it until my spritz bottle was done. I learned my hair loved both ingredients, so in my next batch I added a new ingredient: Argan Oil. If you find a mix that works great on your hair, continue using it. If it's just okay, retry with a new ingredient until you reach perfection. 
  • If there's a particular ingredient that you find always works well on your hair, make it a staple to your hair recipes, adding it as a standard part of all your recipes. For me, I try to incorporate EVOO into anything that touches my hair since my hair loves it so much. 
  • Alternate the way you apply the mixes to your hair. This is how I figure what recipes work best on dry hair and which ones work best on wet hair. Once again it's a game of trial & error until you find something that works best for you. 
  • Take note of what works for you & how it worked. Some recipes may be better for deep conditioning while others make great for clarifying. 
  • Do your research! If you're hectic about putting bananas in your hair, make use of resources available to you before doing so. This was how I found out that using banana baby food works just as well as using a regular banana. Search through blogs & forums for your particular ingredients. You'll find others who have probably tried the same type of recipe share their success or horror stories. 
  • Take a trip to your local grocery store & explore! I don't think anyone gets as excited as I do now whenever I pass a Whole Foods or a GNC. I encourage you all to experiment with essential oils and powders that you wouldn't normally find at your beauty supply or drug stores. 
So remember, a recipe failure is a good thing -- it's just your hair letting you know that it doesn't respond well to certain ingredients. The worst thing that can happen is you'll need to rewash your hair, so I encourage you all to get creative!

Follow POH on Twitter | Like POH on Facebook | Subscribe to POH on YT

9/28/11

The Benefits of Bananas for Hair


I did my first banana DC this week using banana baby food + EVOO + honey. Left it on for a couple of hours and when I rinsed it out I was totally amazed at just how awesome my hair felt. It had an awesome shine to it, felt soft as ever and added volume to my hair. Needless to say, I'm definitely going to be doing this DC biweekly. I wanted to share with you ladies the benefits of using bananas for the hair. I know when I first became natural I saw a lot of recipes that included using a banana but never had a full understanding of why.

Bananas are rich in potassium, natural oils, carbohydrates and vitamins that help in softening the hair and protects the hair's natural elasticity preventing split ends and breakage. Bananas when used for hair has a number of benefits such as it creates manageability, shine, growth and controls dandruff. These are simply the best for hair and the scalp.

Bananas enhance the strength, endurance and shine of the hair. Bananas are full of vitamins and is a number one ingredient for strengthening and volumizing the hair. It helps in repairing dry and sun-damaged hair. The damages that are caused to the hair by exposure to the dirt, pollution and other environmental toxins can be treated with the banana mask. It helps in protecting the hair from further damage. The vitamin B helps in the prevention of split ends. The type of hair that is suitable for this treatment are dry hair, dyed hair and for hair after perm. It also serves as an excellent treatment for addressing the problem of dandruff and is helpful in retaining moisture on your scalp.

What are some hair recipes you do that include bananas? 


Follow POH on Twitter | Like POH on Facebook | Subscribe to POH on YT

9/21/11

Oil Based & Water Based Moisturizers


There are two different types of moisturizers one should consider when looking for products: oil based and water based.

Whereas oil based moisturizers coat the hair shaft, as well as seals in moisture, water based moisturizers penetrate the hair shaft. In order to use either moisturizer effectively, will must always apply your water based moisturizer first then the oil based moisturizer. Think, water first then oil.

Oils do not moisturize your hair effectively. Instead, they seal moisture in (and out) of your hair. They should only be used for sealing moisture, as well as adding shine to hair. One way of combating dryness is using a penetrating moisturizer, such as coconut oil. Coconut oil is the only oil that penetrates the hair shaft; other oils only coat it. EVCO can be used as a daily moisturizer, as well as a water based moisturizer.

The best way of knowing if your product is water based or not is to check the ingredients. If water (aqua) is the first listed ingredient then that product is water based. If water is listed, but not first -- it's not a water based product. Keep in mind, water based moisturizers penetrate the hair shaft.

Some water based moisturizers you can try:
  • Giovanni Direct Leave In (My favorite) 
  • Cantu Shea Butter Leave In 
  • Jane Carter Revitalizing Leave In 
What oil and water based moisturizers do you use? 

Follow POH on Twitter | Like POH on Facebook | Subscribe to POH on YT

5 Hair Products That Saved My Life When I BCed


It seems like as each day passes, more & more ladies are joining the natural hair community and going through with their Big Chop. I've been giving some tips to those newly naturals via Twitter & other hair forums, but I figured it would just be best to write up a post of the products that definitely helped me through the first few months of my TWA. I tried to keep my regimen as simple as possible so I could really learn about my hair. It wasn't until my fifth month in of being natural that I started experimenting with more products & oils. So below are the 5 products that I still use that just helped me deal with that dry hair that some may experience when first going natural:
  • Extra Virgin Olive Oil - This was the first oil I started using on my hair mainly because it was easily accessible -- it's always in my kitchen. I mixed this with some purified water & had created my first spritz. My hair absolutely loves EVOO & it works absolutely wonderful for maintaining moisture. 
  • Giovanni Direct Leave-In Conditioner - I absolutely love this product. This product leaves my hair feelings amazingly soft & moisturized. Check out the product review HERE
  • Aussie Moist Conditioner - This was the only conditioner I used for the first five months of my natural hair journey. Although it does contain silicones (Bis-Aminopropyl Dimethicone), this conditioner helped me combat my extremely dry hair. During the spring & summer months, I'd cowash daily with the Aussie Moist & my hair truly appreciated it. Check out the product review HERE
  • Eco Styler Olive Oil Styling Gel - Although, I'm not a big fan of this product nowadays (only use it only my edges now) -- it definitely came in handy when I had my TWA. I would apply this last on my wash & goes & it would definitely make my curls pop. I also loved it because it helped with shrinkage. Check out the product review HERE
  • Shea Moisture Coconut & Hibiscus Curl & Style Conditioning Milk - This product was my go to when I decided to start trying out two strand twist. I'd use the Conditioning Milk to moisturize my two or three day hair. This would keep my hair moisturized for hours & was definitely my savior during those dry summer months that just passed. Check out the product review HERE
What are some hair products you use that have 'saved' your life? 


Follow POH on Twitter | Like POH on Facebook | Subscribe to POH on YT

9/19/11

Hair Tip of the Day: #12

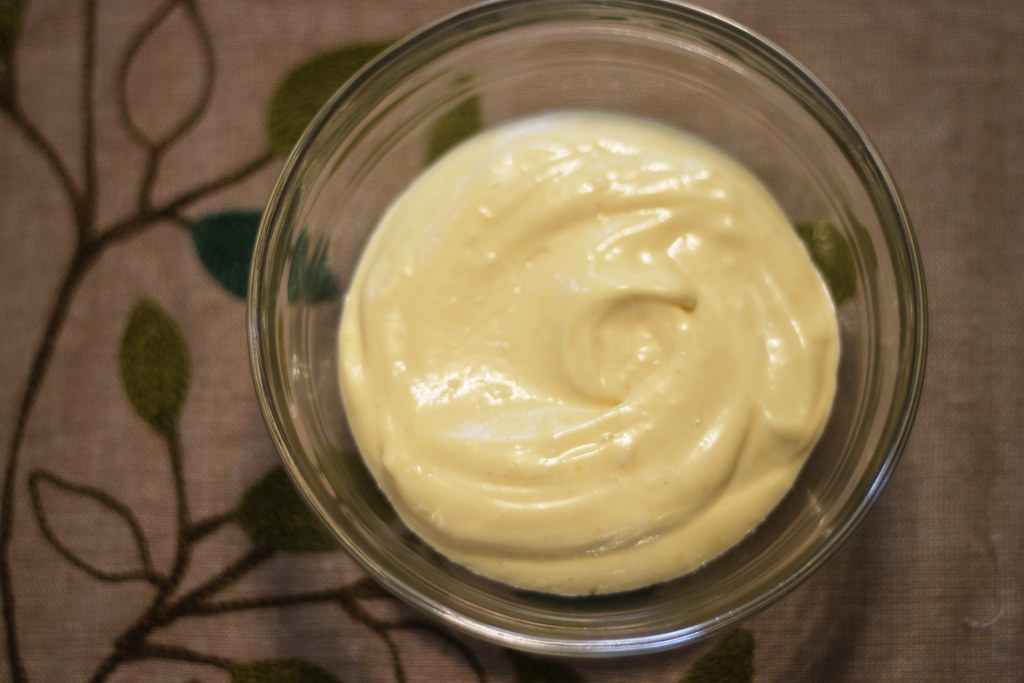
Use mayonnaise to restore vitality and sheen to your strands.


A mayonnaise hair treatment is an effective hair conditioner that can help restore vitality and sheen to your hair. It contains oil, vinegar and egg yolk, which are all natural conditioners and cleansers that help in adding luster and shine to the hair. Mayonnaise is especially recommended for dry and overly damaged hair.

Simply apply a liberal coat of mayonnaise on your hair, making sure to cover strands from the root to the tips. Leave on for at least a half hour, then wash normally.

via NaturallyCurly

Follow POH on Twitter | Like POH on Facebook | Subscribe to POH on YT

9/14/11

Healthy Hair Tips: Food & Essential Nutrients

By: Alisha Anderson


Who doesn’t like having fluffy bouncy hair that you're able to get by simply doing easy work? 9 out of 10 folks seek for a 'magic trick' that could guarantee them healthy, sturdy and glossy hair. This can be solely achieved if you eat a balanced diet that has all necessary nutrients. One ought to eat healthy foods that contain essential vitamins & minerals that facilitate in maintaining smarter, healthier hair and skin.

Many times folks have dangerous food habits that don’t offer essential vitamins and minerals. Hence, they need to rely upon other sources, like supplements, to compensate the nutrients’ deficiency within the body. However, it's suggested that one can purchase the supplements that are duly prescribed by doctor.
  • Eat broccoli, spinach and different inexperienced leafy vegetables. These vegetables are made in vitamin A and vitamin C. Intake of nutrient made foods will enhance sebum that works as a hair’s natural conditioner.
  • Flax seed (or flax seed oil) may be a nice supply of omega 3-fatty acid. this sort of fatty acid is additionally found in salmon. Fish like salmon is made in iron and vitamin B. Such foods are smart for hair growth.
  • Walnuts are a necessary supply of omega-3 fatty acids. different nuts like cashews, almond and pecan are a good supply of Zinc. Many times, intake of foods that contain less zinc will result in hair loss.
  • Chicken & turkey contains top quality protein that's essential for sturdy hair. Different poultry products conjointly offer iron and essential nutrients. One should eat beef for healthy scalp.
  • Eggs may be a made supply of protein, yet different dairy product conjointly offer many advantages. It's smart for shiny hair and a healthy scalp.
  • Drink lots of water. It's very important for moisturizing hair, as well as necessary in preventing dehydration. 
  • Green tea is great for healthy skin. It's an antioxidant that helps scale back free radicals that cause aging. Studies show that just about every kind of tea is good for the hair. 
  • Juices are smart for hair as they'll offer necessary minerals, vitamins and nutrients. Hair stays moisturized if you drink them in correct quantities. Excess intake of juices could result in weight gain.
Above all, you must wash your hair with an honest quality shampoo. Don’t use intense heat sources like hair straighteners, or highly regarded hair dryers. Just be sure to find yourself a good quality shampoo and conditioner along with incorporating these essential nutrients into your daily diet.

Alisha Anderson is an eminent analyst and writer in beauty and hair care related topics. She has written different topics on face shape hairstyles and how to nutrice your hair.

Follow POH on Twitter | Like POH on Facebook | Subscribe to POH on YT

The Ayurvedic Breakdown


As of recently I've been thinking about trying to incorporate Ayurvedic treatments into my regimen for the Fall so I've been doing a lot of research on the subject that I will start sharing with the blog. Nonetheless, one of the first things that threw me off about Ayurvedic treatments was all the powders. If you had to ask me how to pronounce them, I doubt I'd say it correctly, so of course I had to research what each of these powders do. After reading through several forums, I've gotten a list of common herb powders a lot of other female naturals seem to use in their regimens & will discuss what each one does.

Alma 
Known for having the highest content of vitamin C, Alma is especially good for boosting the immune system. In hair care, Alma is used in oil infused tonics or in powder form to provide added strength to hair toots, bring luster to hair, encourage hair growth and addresses premature greying. In skin care, face masks using Alma paste provides nourishment to skin thereby assisting with dullness of skin.

Bhringraj 
Bhringraj is an ancient ayurvedic herb widely known for its effectiveness against hair ailments. In ayurveda, the herb is used for treating hair loss, improving hair texture, and to stop premature balding and graying and various skin allergies. Alopecia sufferers will also find bhringraj to be beneficial in promoting hair regrowth. Even without suffering any ailments, bhringraj aids in luxurious hair growth.

Infusing bhringraj in an oil such as coconut or sesame oil to massage onto the scalp will help with baldness and can cause a regrowth of hair. Use as a paste in combination with amla, brahmi, shikakai, tulsi, and/or neem to see wonderful growth and hair conditioning benefits.

Brahmi 
Brahmi is best known traditionally for its rejuvenating properties affecting brain cells and bringing improvements to memory functions. For hair care, Brahmi is best used in combination with alma, bhringraj, shikakai, tulsi &/or neem powders to provide not only stronger roots, but also thicker hair and relieft from itchy scalps. Brahmi can be used in a paste, a tea spritz for hair or in an oil infusion.

Cassia 
Cassia, also known as neutral henna, is used by many who want the benefits of conditioning that comes from henna, but without dramatic color changes. Cassia will turn gray hairs a pale blondish color, but shows no color difference on darker hair.

Henna
Henna works to stop breakage by strengthening the hair shaft. Henna also works to seal and repair the cuticle which makes for more manageable hair, a plus when it comes to detangling. Although Henna is mainly known as a mega strengthener, Henna has conditioning properties as well, which leaves the hair shiny, soft and fully of body.

Hibiscus Petal
In Ayurveda, Hibiscus (Jaswand) is known as one of the best secrets to beautiful and healthy hair. Hibiscus promotes hair growth, stops hairfall, gives hair a healthy luster with bounce, and delays premature graying. Hibiscus has been a wonderful ingredient in hair treatments that combine other ayurvedic herbs such as alma and brahmi. For henna color treatments, hibiscus is used to achieve a burgandy to black cherry color on hair. It is also slightly acidic and helps to aid in a faster henna dye release. As a drinkable tea, hibiscus is a natural body coolant and makes a great refreshing drink. Even better is using hibiscus powdersad in a tea rinse for hair!

Kapur Kachri
Kapur Kachri promotes growth by stimulating the roots. It also has antiseptic properties benefitting to the scalp.

Kalpi Tone
Kalpi Tone works to strengthen hair at the root and hair shaft, as well as promote hair growth. It leaves your hair noticeably stronger, softer and full of body.

Neem Powder
Neem is known in Ayurveda for its powerful effectiveness in fighting diseases. Its properties are naturally antibacterial, antifungal, and antiviral.

In skin care, a paste made with neem will remove excess oils from the face and clear pimples. It will also aid with scars. When used in a soap or oil, neem can help to relieve dry skin as well as the itchiness and redness from eczema. In a salve or cream, neem's antiseptic properties aid in healing cuts and minor wounds. Using neem to make a tea or face mask will help to treat acne.

In hair care, neem promotes shiny, healthy hair, combats dryness of scalp, and fights scalp infections and dandruff. Undiluted neem oil will help treat head lice.

Orange Peel
The properties in orange peels are primarily antioxidant and astringent, making orange peel powder a natural in helping to prevent pimples and acne as well as prevent premature aging and wrinkling. Using orange peel powder in a face mask helps to reduce shine from excess oil and remove dead skin cells.

Reetha
Reetha, commonly known as soapnuts, is a natural cleanser. Soapnuts have gentle insecticidal properties and are traditionally used for removing lice from the scalp.

Shikakai 
Shikakai is an herb known in ayurveda for its cleansing properties and natural mild foaming properties. Literally meaning "fruit for hair", it has been traditionally used for beautiful and healthy hair as a mild shampoo. Shikakai has anti-dandruff properties and is known to aid with detangling of hair. Mixing shikakai with amla promotes hair strengthening and conditioning. This naturally astringent herb will also promote a healthy scalp and stronger roots.

Best for all hair types. However, for hair that is prone to dryness, shikakai is best used sparingly and mixed with an additional herb, such as amla.

Tulsi
Tulsi, or Holy Basil, is known to promote health and for having healing properties. It is a purifying herb and additionally has antiseptic properties. The powder form has a purifying action for the blood. It addresses all sorts of skin diseases when prepared properly, such as ringworm, skin eruptions, scabies, eczema, minor wounds, itching, and scalp irritations and infections. In beauty, tulsi is effective in removing blemishes, treating acne, and for removing dirt deep in pores.

Now that I'm a little more familiar with what each does, I will begin experimenting with them as the months pass. I still have to do my Henna + Alma mix, so I guess that's a great place to start.

Do you use an Ayurvedic Regimen for your hair? If so, what are some ingredients? 


Follow POH on Twitter | Like POH on Facebook | Subscribe to POH on YT

All About Bentonite Clay


I've been hearing more and more about Bentonite Clay & after seeing some in Whole Foods, I'm considering purchasing it. From what I've been reading, Bentonite Clay is great for not only your hair, but your skin as well. Bentonite Clay is packed with over 70 naturally occurring trace minerals that when mixed with water, swells and draws out dirt, oils, toxins and any other impurities like a sponge. This alone basically had me sold, especially when it comes to my skin. 
  • Bentonite Clay is excellent for rejuvenating & cleansing the skin. Topical applications are helpful for acne, eczema, psoriasis, rashes, wound healing and help draw poison from ant, bee, wasp and similar bug stings and bites. It draws excess oils and debris to the surface, boosts circulation to tighten the skin and stimulate blood flow and whisk away dead skin cells that can clog pores. 
  • Bentonite Clay can be applied topically to skin and wounds or taken orally to draw toxins and impurities out the body quickly. It removes poisons and intestinal parasites out of the intestinal tract while alkalizing the body. 
  • Bentonite is a swelling clay. When it is mixed with water, it rapidly swells open like a highly porous sponge. From here the toxins are drawn into the sponge through electrical attraction and once there, they are bound. 
  • Bentonite Clay may also be used like a shampoo, trapping and removing dirt, debris, build up and other particles from your hair & scalp. 
I've come across several different DIY recipes I will be sharing with you ladies using Bentonite Clay for your hair, face & body. I will be going back out to Whole Foods this week and purchasing a bottle, or getting it from my best friend. I'm more tempted to try this on my skin then anything. I have heard nothing but great reviews from it from other natural hair ladies, as they mention their hair is usually easier to tangle, softer & shinier after using the Bentonite so I am excited to try.

Have you used Bentonite Clay for your hair & skin? Did you love the results? 


Follow POH on Twitter | Like POH on Facebook | Subscribe to POH on YT

9/10/11

Is It Possible To Have Healthy Relaxed Hair?


We all have our reasons for going natural. In my case, it was purely by accident but I still needed something 'cost efficient' to maintain. While a majority of my friends are natural, I do have a few that aren't & would never consider going natural in their lifetime. Within the six months of being natural, I've researched and learned some much vital information pertaining to natural haircare. My natural hair goals are more geared towards maintaining a healthy set of hair, as opposed to length. I feel if my hair is healthy, the length will come.

I've noticed through some forums I'm on the topic of healthy relaxed hair arises. Is it really possible to achieve healthy relaxed hair? I say of course! When I had relaxed hair, I would definitely have considered my hair healthy. So as I've gained greater knowledge on haircare within these last few months, I wanted to share some advice to my relaxed hair ladies in steps to maintaining a healthy set of hair.
  • Don't leave the relaxers in too long. One of the main things I realized I did wrong when I used to get my hair relaxed was allow for the relaxer to be left in way too long. Growing up as a black girl, I was always taught in salons that the longer you leave the relaxer in, the straighter your hair will be. I've always had obnoxiously thick hair so I always thought it was vitally important for me to sacrifice a few burn scabs in my hair to achieve that bone straight look I once loved so much. This is something I believe we are all taught & it is WRONG. If you are getting your hair relaxed, you shouldn't keep it in until it's bone straight. The straighter our hair becomes the less strength it has causing it break more easily. If you are going to get your hair relaxed, I suggest using a mild relaxer (Not those Super strength perms!). 
  • Wait at least 90 days before getting relaxers. I remember my stylists always saying I needed a touch-up every three weeks and a full relaxer every six weeks. Once again, absolutely not. My 16 yr old sister is living proof to me that you can still have straight hair without needing a relaxer. I believe her last relaxer was a year ago & she'll just get a wash & set with minimal heat every month or so. 
  • If you are going to use relaxers, only relax the new growth. This was only done for me when I needed 'touch ups' & when it was time for a full relaxer my whole head--from scalp to ends--was then saturated in relaxer. Don't do it! One of the important things about hair growth is maintaining healthy ends, which result in less breakage. By relaxing your ends, you are making your hair more vulnerable to breakage. 
  • Try to avoid using too much direct heat. I know, this seems like a ridiculous thing to say for ladies with relaxed hair who go day by day flat ironing their hair--but seriously, the less heat the better. Heat damage can be a major attribute to hair breakage. When I had relaxed hair I would always wrap it nightly to avoid having to flat iron it in the morning. Usually worked. And remember, there are always rollers. If you do have to use heat on your hair occasionally, I'd definitely suggest using Grapeseed Oil has a heat protectant, as it can withstand high temperatures. I'd also recommend air drying as your hair will appear thicker. 
  • Protect your hair at night. Whether relaxed or natural hair, you should always avoid cotton like the plague. Make sure to wear a satin scarf or bonnet, or pillowcase. 
  • Use Protective Styling. The less your actual hair & ends are out, the better. This way they'll be protected. I know I always just wore my hair out & never really saw any real growth. My hair was at my shoulder for all of my relaxed hair life it seemed. It wasn't until I begin wearing weaves that my hair begin growing more & more. I know when having relaxed hair, wearing it out is the easiest thing to do to it -- but I'd definitely recommend experimenting with more up dos & styles that can last you a few days. 
  • Deep condition, deep condition, deep condition! Whenever I would go into the salon, I'd always pay that $10-15 more to get the deep condition with my washes & relaxers. I never really understood why I was getting it, but I figured it had to be better for my hair. Deep condition is excellent for the hair. It helps lock in and retain some of that moisture that was lost after your shampooing. This is something that should be done at least weekly, especially after shampooing. 
  • Give your relaxed hair regular protein treatments. I know when I had relaxed hair I had NEVER heard of a protein treatment. One thing you should know is that the hair is made up of protein. Obviously, the proper intake of protein can contribute in growing your hair back. It's also good to give your hair an occasional protein treatment to combat breakage & combat that can be caused by relaxers, coloring, etc. Protein is important for keeping the hair strong. I'd suggest trying the Aphogee Two-Step Treatment Protein as a place to start with protein treatments. 
  • Substitute that grease for oil. When I had relaxed hair, I honestly never greased my scalp. I never liked that greasy feel & it always seemed like the grease would just weigh down my hair. Instead of clogging your scalp with grease, substitute for oil. I'd recommend something like Black Jamaican Castor Oil since it's a pretty thick oil that's great for moisture & shine. 

These were just some tips that I would suggest to any relaxed ladies out there looking to maintain a healthy set of hair, as well as naturals for that matter--minus the whole relaxing. As long as you wash gently, conditioner often, minimize heat use, moisturize often and protect your ends, you should have healthy hair--whether relaxed or natural.

Follow POH on Twitter | Like POH on Facebook | Subscribe to POH on YT

8/31/11

The Mizani Natural Curl Key

I know one of the biggest confusions within the natural hair community seems to be figuring out what 'hair type' you are. September 2 marks my 6th months of being natural & honestly, I still am unable to properly identify my hair type. My hair towards the back tends to go towards the 3c type, while the rest of my head tends to dabble in the 4a or 4b type. But like I said, I honestly still don't know. I figure as I continue along my natural hair journey as my hair continues to grow, I'll be able to have a better look at my curl patterns. Nonetheless, I've wanted to share with you girls another hair classification type I came across this time from MIZANI.

With the support of their world renowned scientists in the United States and France, MIZANI has pioneered the Natural Curl Key. After years of research and testing, their laboratories defined global hair types based on specific-shape criteria and utilizing a scientific approach to measuring features of human-hair strands, including curve diameter, curl index, number of twists and number of waves. This research resulted in the identification of eight distinct hair types worldwide.

I will only be talking about five of the eight hair types today, but feel free to visit HERE for more information on their Natural Curl Key.

Type IV - Curly
Defined, mixed curl patterns: loops to spirals; ringlets to corkscrews
TEXTURE: Thin to thick
GROWTH PATTERN: Grows down from the scalp, then curls
BODY / VOLUME: Body, volume and bounce
ELASTICITY: Moderate stretching with moderate return
POROSITY: Slightly raised to raised cuticle. Prone to fizz.

Type V - Very Curly 
Defined curl with S-shapes forming into coils
TEXTURE: Thin to thick or combination
GROWTH PATTERN: Grows down from the scalp, then curls
BODY / VOLUME: Reduced volume with some movement. Prone to be compact. ELASTICITY: Stretching with minimal return
POROSITY: Raised cuticle. Likely to frizz and tangle.

Type VI - Coiled
Loose afro – medium coils close to the scalp
TEXTURE: Thin to thick or combination
GROWTH PATTERN: Grows up and away from the scalp, then curls
BODY / VOLUME: Some volume. Likely to be compact, less movement. ELASTICITY: Stretching with minimal return
POROSITY: Raised cuticle. Some frizz, tangled.

Type VII - Very Coiled
Tight afro – distinct, springy coils closer to scalp
TEXTURE: Thin to thick or combination
GROWTH PATTERN: Curls directly from the scalp
BODY / VOLUME: Minimal volume. Some compaction, no movement. ELASTICITY: Stretching with minimal return
POROSITY: Raised cuticle. Frizzy, tangled and prone to knot.

Type VIII - Zig-Zag Coiled
Extremely tight afro – interlocking coils and zig-zag patterns
TEXTURE: Thin to thick or combination
GROWTH PATTERN: Curls directly from the scalp
BODY / VOLUME: Compact with no movement
ELASTICITY: Stretching with minimal return
POROSITY: Raised cuticle. Frizzy, tangled with some knots.


The thing I've noticed about my hair when wet & without products its about a Type V. But there are days where, unfortunately I neglect my hair & won't moisturize it & it can turn into a Type VI & VII real fast.

What's your hair type based on the Mizani Natural Curl Key? 

8/22/11

Things You Should Know Before Going Natural


I seem to be meeting more and more females transitioning to natural hair nowadays on Twitter. Since I BC, I didn't have to deal with the struggles of dealing with two completely different textures. I've been searching the Internet and my usual Natural hair blogs I follow to find great articles to forward to you guys. Today, I came across this insightful articles from Curly and Young! Great for transitioners, as well as newly naturals!

Chelsea of Young and Curly writes;

As a newly natural things can get very confusing. There is a wealth of info out there but looking for it and figuring out how to implement the plethora of knowledge into your regimen is a whole other ball game. Plus, it is hard to find the info that is inexpensive and easy to implement for any curly on any budget. So here is a compilation of all the things that I would have liked to know before going natural and simple and cheap tips and tricks to help newbie naturalistas get started.. Enjoy!!

There are two ways that you can embark on your journey, you can either:

Do The Big Chop (BC)
This involves cutting all the relaxed ends of the hair off and growing your hair out naturally

Transition
This process involves stopping the use of relaxers on your hair and allowing the hair to grown in naturally whist trimming off the relaxed ends gradually. This method is preferred as it allows the transitioner to gain a sufficient length of hair that they are comfortable with and get to know their hair and how to care for it before taking the plunge.

MOISTURIZING
Getting enough moisture to the hair is an integral part of caring for your natural hair. Because of the kinks in natural hair it is very hard for the natural oils of the hair to travel down the hair shaft and moisturize it. Thus, as a natural it is imperative that you moisturize your hair. Here are some easy things that you can do to keep your hair moisturized:

  • Use water; water is by far the best moisturizer known to man. In between a styling session simply dampen the hair then seal in the moisture with a light oil (jojoba, grapeseed etc). A popular method of doing this is with the use of a spray bottle. Usually water, a light oil (jojoba, grapeseed, olive) and glycerin is combined and used as a style refresher or light moisturizer during the day.

(Distilled or boiled water should be used for mixes to ensure that a bacterium is not introduced to your mix. Also, to prevent the mixture from becoming a breeding ground for bacteria mix small batches at a time. Lastly, a few drops of an essential oil like grapefruit seed extract or tea tree can act as a preservative for your mix.)

  • Use a water based moisturizer; continuing with the water theme any good manufacturer of a product will know that the best way to moisturize the hair is using water thus, any good moisturizers will contain water as the first ingredient. Having mentioned water based moisturizers I should also explain that some moisturizers are oil or butter based. In and of themselves they are not moisturizing. The way they work is by trapping water near the hair shaft. Thus, they should only be applied to damp hair or over a moisturizing leave in and never on their own.
  • Another easy and inexpensive way to get your moisture on is by baggying. This method involves placing a shower cap on your head for an extended length of time (usually done whilst asleep). This helps to trap the moisture around the hair and create a slight steam effect. I swear by this, method of moisturizing and have experienced whole days of moisture after one night of baggying.

(If you run out of shower caps or your hair is big and puffy and laughs at the small plastic shower caps then grab a grocery bag. They work just as well as shower caps and are larger to accommodate more hair. Simply put it on your head and to secure it gather the excess around the rim twist and tuck under. Not only will this help you get rid of all the grocery bags lying around the house and make you feel less guilty about your environmental footprint it is also cheap.)

If you neglect all else please remember this one tip as failure to properly moisturize your hair will lead to tangles and breakage.

DEVELOPING A GOOD REGIMEN
It is critical that as a natural you develop a good regimen that you can stick to in to reach your desired hair goals. I do not want to beat a dead horse as I have already written a post on this so simply click the link here

PROTEIN TREATING
Relaxers work by breaking the protein bonds in the hair that normally give the hair its kinky texture. Once those bonds have been broken to straighten the hair it can become weak and brittle. As your new growth comes in stronger it is important to keep your relaxed ends healthy as well to prevent excessive breakage. The best way to do this is by deep treating the hair using protein treatments. Some inexpensive and well raved about protein treatments are Aubrey Organics Glycogen Protein Balancing Conditioner and Aphogee Protein Treatment. Also another inexpensive way to get more protein is by using Infusium products.

However a word of caution must be issued. Too much protein can cause the hair to become straw like and dry. To ensure that your hair has the right balance between moisture and protein conduct the simple test here.

DETANGLING
As a natural with kinks and coils it is imperative that we take caution when detangling our hair as every bend in our hair is a site where it is susceptible to breakage. To avoid breakage simple steps can be taken. The two ways that naturals can detangle is wet or dry so here is a break down of the best way to go about detangling either way.

Dry
When detangling dry it is important to note that the hair is less elastic then when wet thus, it is more likely to break when tugged on. Thus, the best way to approach this detangling session is in stages. The first stage should involve the loosening of the hair and gentle separating of any large knots with the use of ones fingers. This is called finger detangling. Then one should use a large toothed comb to further detangle and remove shed hairs. Lastly, one can follow up with a finer toothed detangling comb or brush to remove all shed hairs or for styling purposes.

Please note that it is recommended that you lubricate your hair with a light oil or water to aid in detangling.

Wet
When wet the hair is more elastic and can withstand more tugging also the hair is very lubricated which is probably why it seems to be the favored method of detangling. This method is best executed when the hair is soaking wet and loaded with a conditioner with plenty of ‘slip’ for easy detangling. This method can be approached the same way as detangling whilst dry i.e. in stages.

Please note that hair should always be detangled from the tip to the root of the hair and NEVER the other way around. Also to prevent tangles hair should be detangled in sections and twisted or plaited immediately after it has been washed to prevent it from re-tangling.

Tips for purchasing detangling tools
When one sets out to purchase a detangling tool careful consideration must be placed on the item that will be purchased. Things to keep in mind are:

  • Is the tool seamless? If it is not then it is highly likely that your strands could get caught in the tool and break off. This also applies to the little balls at the end of bristles on brushes. Ensure that the balls are seamless and not glued on.
  • Are the teeth spaced too close together? If the teeth are closely spaced then depending on your hair texture it may be difficult for you to get your hair through the spaces.

MISCELLANEOUS
Homemade mixes
As a new natural I looked forward to whipping up my own mixes at home. After being educated on the ingredients that were good for the hair I took great pleasure in creating a product that I not only knew would be good for my hair but that I knew exactly what was in it. Some easy products to whip up yourself cheaply and inexpensively are Deep Conditioners and Whipped Butters and here’s how.

DC's
The easiest way to create your own DC is by using a thick and creamy wash out conditioner as your base and adding ingredients to it. Things that you probably have at home that are good for your hair are oils (olive, coconut and castor) honey, mayo and eggs (for light protein), banana (puree well as banana can be a pain to rinse out), avocado etc. Simply mix it all up, apply it to your hair and wear a shower cap for no less than half an hour then rinse.
Please note that you can not mix large quantities of your DC to use at a later date as it can not be preserved.

Whipped Puddings
Another fun and easy DIY hair product is whipped puddings. They are usually created with butter bases like shea, mango and or cocoa butter. Ingredients like various oils such as olive, jojoba, coconut and castor oil can be added. You can either melt the butter and oil then stir it as it hardens or use a hand mixture to combine the ingredients. Some women also include aloe vera gel to create a pudding that can also be used as a styler. Simply mix small batches using various ratios of oils until you find your right mix.

Ingredients to look out for and shy away from
Look out for oils like grapeseed, olive oil, castor oil, coconut oil, vatika oil (a mixture of coconut oil and various Indian oils)

Also aloe vera gel can be used as a styling agent and helps to lower the pH of the hair to close the cuticles and give your hair more shine (for more info on pH balancing hair click here) (http://curlyandyoung.blogspot.com/2011/04/curly-q-understanding-hair-ph.html)

Stay away from petrolatum and mineral oils as they are heavy oils that simply coat the hair strand and do not allow moisture to penetrate it which will only serve to make your hair dry.

Things you should know
During the transitioning process you will see breakage as the point where your natural hair meets your relaxed ends (referred to as the demarcation line) is very fragile. It is easy for the hair to break off at this point so simply prepare yourself to see more shed hairs than normal.

Detangling time will increase as your natural hair comes forth. Natural hair being more textured than relaxed hair will obviously take more time to detangle. However, transitioners may have a higher detangling time as the point where the natural hair meets the relaxed ends is extremely fragile thus, to avoid breakage extra caution must be taken.

Not everyone will like your decision
As young naturals this is particularly hard to swallow. We are at a time in our lives when we are looking to be accepted by our peers. The last thing we want is to feel alienated and deemed ugly. However, sometimes we do not give others enough credit. There will be people who will find you going natural a powerful statement and admire your bravery for doing so at a time when straight hair is deemed the only beautiful. Also they may find your new look different and cute. However, there will always be the naysayers in your life and all you can really do is try to educate them and keep it moving. Your healthy hair and growth will speak for itself. Also think about it if you allow what others say to play a major role in your decision making then it speaks volumes as to what the rest of your life will be like.

Is there anything you wish you knew before going natural? 

8/11/11

Hair Tip of the Day: #11

Use Rosemary Oil for Hair Loss & Thinning Hair.


Rosemary has been proven to stimulate hair follicles to make hair grow longer, stronger and thicker over time. Massaging rosemary oil into your scalp increases blood circulation to hair follicles, making the roots stronger and leading to less hair loss.

via NaturallyCurly

8/10/11

Back To School on a Budget!


The Summer is almost over, unfortunately and now it's time for a lot of the college students to head back to campus & prepare for yet another academic year. During my college years, I attended the University of Connecticut, in which I lived on campus. Although I wasn't natural at the time, usually around this time I would start preparing a list of all the things I need to get before heading back. I basically spent my college years wearing weaves, so I never really had that to incorporate buying hair products into my list. Now we all know buying hair products eventually can become a little costly, and being a college student that can pose as a major problem. Well, good news. I'm here to help. I figured I would compose a Back to School List of hair products for my college girls on a budget. The last thing you want to do is spend over $50 for hair products when you know you're going to have to buy textbooks soon. So hopefully this little list helps, I'd love to hear from some of college naturals & what they think should be added to the list.

Also, I'm a big fan of Target & Walgreens. So I tried to get the best value price between both stores, as well as helping you get more bang for your buck! You can follow this list for the best prices, or just go to either store because both of them do carry all the products I will be listing!

CONDITIONERS:
A cheap conditioner for co-washing can go a long way. Plus, you can always add some oils & other natural ingredients to your own deep condition treatment!

  • Clairol Herbal Essence Hello Hydration Moisturizing Conditioners, 23.7oz - $3.89 [Walgreens]
  • Aussie Moist Conditioner, 33.8oz - $6.49 [Walgreens]
  • Suave Professionals Moisturizing Conditioner - Almond & Shea Butter, 28.0 oz - $3.49 [Walgreens]

LEAVE IN CONDITIONERS:
A cheap alternative to leave-in conditioners is just using the conditioners you co-wash with. Some people may question this method, but I assure you it's perfectly fine.

  • Giovanni Direct Leave In Conditioner, 8.5 oz - $7.99 [Target]
  • Cantu Shea Butter Leave In Conditioning Repair Cream, 16 oz - $4.99 [Walgreens]

DEEP CONDITIONERS:
For deep conditioners, to be cost efficient, I'd recommend just using your current conditioner & add some ingredients, such as EVOO & honey. No need to go out in purchase anything!

PRE-POOS:
You really don't need to purchase any products for a pre-poo treatment. You're better off using some of your conditioner or oils, or both as a pre-poo.

SHAMPOOS:
For the first four months of my natural hair journey, I didn't use shampoo at all. Instead of using shampoo at the time, I just purchased the cheapest bottle of Apple Cider Vinegar I found & called it a day. Whenever my scalp felt like I had build up, I just did a ACV wash. You obviously know your hair better than I do, so this can act as another cost efficient substitute.

  • Suave Professionals Moisturizing Shampoo - Almond & Shea Butter, 28 oz - $3.49 [Walgreens]

STYLERS:
For styling, I personally think you can't go wrong if you use either Eco Styler or Shea Moisture. EcoStyler works amazing for TWAs, as well as long hair & Shea Moisture is just all around a great product to have.

  • EcoStyler Gel w. Olive Oil, 16 oz - $2.99 [Walgreens]
  • Shea Moisture Coconut & Hibiscus Curl & Style Conditioning Milk, 8 oz. $9.99 
  • Shea Moisture Organic Curl Enhancing Smooth, 12.oz $9.99

OILS:
Aside from your conditioner, I think Oils are one of the essential products you'll want to have available at all times. Oils can be added to any of your products to give it an extra HUMPH and they work great for DC & Pre-Poos. Plus, if you have access to a microwave, you can warm oil up for about 12-15 seconds & give yourself a nice oil massage!

  • Extra Virgin Olive Oil - Look for the cheapest, biggest bottle you can find at your local grocery store!
  • Extra Virgin Coconut Oil

EVERYDAY KITCHEN INGREDIENTS:
There may be times when you want to give your hair a special treatment without going broke. I personally like walking around my kitchen finding ingedients that I can throw in my hair, so I feel you'll never go wrong if you have some everyday kitchen ingredients around. These are some basic ingredients that can help spice up your DCs or when used together work great as Protein Treatments.

  • Honey
  • Mayonnaise
  • Bananas or Organic Banana Baby Food
  • Eggs

MUST HAVE HAIR PRODUCTS:
These are things that you definitely will need to have, along with all your products!

  • Satin Scarf, Bonnet or Pillowcase
  • Wide Tooth Comb
  • Sheer Stockings [To use as hair ties]
  • Plastics Caps
  • Hard Bristle Brush

Is there anything you'd add to the list?

8/9/11

Hair Q&A: Pre-poo? What is that & how do I do it?

Q: I see a lot of Naturals always talking about a Pre-Poo? What is that & how can I incorporate it into my hair regimen?

A: Pre-poo, also known as a pre-shampoo conditioner, is when you either take conditioner or oils, or both and apply it to your hair usually before shampooing your hair. Pre-pooing will help ensure the hair stays moisturized even after shampooing with a product that contains sulfates (which is usually drying to the hair -- so we try to avoid it).


There are many natural homemade recipes you can try as pre-poo treatments. The recipe I use is a simple, quick & cheap recipe involving: EVOO (Extra Virgin Olive Oil) & EVCO (Extra Virgin Coconut Oil). I mix 1/3 of each oil into a plastic bowl before throwing it in the microwave for about 20 seconds. With the warm oil, I then take about 10 minutes to roughly part my hair with my fingertips & apply the warm oil to my scalp while massaging it in thoroughly. After finishing up my oil massage, I basically will pour the remainder oil in my hair, making sure I lather the ends. I usually will leave this in for up to an hour, or more depending on what I'm doing.

Now this is just one of the pre-poos I use. Feel free to incorporate a little of your conditioner and own oils to come up with your own formula. The beauty about natural hair is finding out what works for you.

What ingredients do you use as a pre-poo? 

Hair Tip of the Day: #10

Use Grapeseed oil as a heat protectant.


Next time you're considering applying heat to your hair, use Grapeseed Oil to protect your hair from heat damage. Grapeseed Oil is able to withstand high heat (temperatures up to 450F), making it a great all natural heat protectant. It also absorbs into hair without weighing it down and excellent for adding moisture and shine. It is known for having a high content of linoleic acid which is an important fatty acid that supports cell health. Most importantly, it’s fairly inexpensive & can be found in most grocery and health stores.

8/8/11

The Benefits of Oil Rinsing


Ever since I picked up my first batch of oils last week, I've just been looking for different ways to implement them into my everyday life. One way I've started doing this is by incorporating oil rinses into my weekly hair regimen. Not only is oil rinsing great for cutting down (and in some cases eliminating) single strand knots, but it also helps replenish moisture lost from shampooing; leaving your hair soft, shiny and extremely manageable. Oil rinsing is a simple step you can add in-between shampooing or conditioning and only takes about 5-10 additional minutes.

Some of the benefits of oil rinsing include:

  • Helps hair retain more moisture
  • Erases the detangling process
  • Adds mega shine
  • Helps prevent knotting, tangles and matting

To Oil Rinse, follow these simple steps:

  • Shampoo your hair
  • Add about 1/4 cup of your favorite oil thoroughly throughout your hair
  • Leave in for about 2-3 minutes
  • Rinse out thoroughly with warm water (Don't use cool for this process, as the warm water ensures that all traces of oil are removed)
  • Condition hair as usual

Rich Nourishing Oils:

  • Coconut Oil: Softens the hair, delivers nutrients to the follicles, helps correct issues with dandruff and psoriasis
  • Extra Virgin Olive Oil: Ultra hydrating, this oil nourishes, softens and improves the elasticity of your hair
  • Castor Oil: Another extremely hydrating oil, it also helps remove impurities from your scalp and hair shaft. Castor Oil also nourishes your follicles promoting healthy hair growth.


8/7/11

The All-in-One Elixir: Grapeseed Oil


When I went oil shopping a few days ago, I had originally picked up Grapeseed Oil as one of my purchases. I remembered reading some other hair recipes including it that I wanted to try. Yet, not really thinking it was beneficial to my regimen I quickly replaced it with my Eucalyptus Oil. Today while browsing All Day Natural, I came across this lovely article about Grapeseed Oil that I just had to share. Needless to say, I'll be taking another trip back this week to pick up my Grapeseed Oil.

Miss Lycia of All Day Natural writes;

Gather round and pay attention, friends. For those who don’t already know, I just HAD to share with you the perfect elixir for all of your natural beauty needs. No, it’s not some expensive cream or rare potion from the rainforest. You can find this at your local grocery store: grapeseed oil!

Where do I begin? I use grapeseed oil as my go-to gem for my skin and hair. Like other natural oils I have featured before, it has a multitude of uses.


  • Beat the Heat. Grapeseed oil is absolutely ideal as a heat protectant for those of you who blow-dry or flat iron your hair. It moisturizes well, without being too greasy and helps to protect the ends from heat damage. Daphne from the informative natural hair blog, Une Autre Naturelle, shared the impressive results of using grapeseed oil on her daughter’s gorgeous hair.
  • Maximum Moisture. As I have shared before, my hair tends to be dryyyyy. Incorporating grapeseed oil into my hair treatments always makes my hair oh-so-soft! Before washing my hair, I sometimes apply a small amount of grapeseed oil and massage it into my tresses. I then rinse and deep condition. My hair is instantly detangled.
  • Let It Shine. For my everyday styling, I like to add a little bit of grapeseed oil to my hair butters and creams. It creates a softer consistency, making it easier to apply and absorb into my hair. Best of all, it creates a remarkable shine. Kiss your dull strands goodbye! The dynamic maven behind the blog AGrlCanMac is also a dedicated advocate of grapeseed oil. She always has a plethora of creative mixes.
  • Take It Off. This is my favorite use for grapeseed oil…as a makeup remover! I actually discovered it by accident. No longer do you have to use the expensive (sometimes toxic) cleansers and removers. Just dab a bit of grapeseed oil on a tissue and swipe. It works wonders for eyeshadow and eyeliner. Of course, be careful not to get any oil in your eye!
  • Skin Soother. Like olive oil, you can use grapeseed oil as a great year-round moisturizer on your skin. It’s heavy enough for cold weather days, but light enough for the sweltering heat. Best of all, it’s not greasy either. Just like with the hair mixes, you can add grapeseed oil to your lotions and creams for maximum potential. It also helps to alleviate skin irritation after shaving.
  • Pucker Up. You can even use grapeseed oil on your lips! Curly Nikki has an excellent, very simple recipe for dry lips. The blog Healthy Hair and Body also has a recipe for a lip balm using grapeseed oil.

Hope you enjoy experimenting with this optimal elixir!

Have you used grapeseed oil before? How do you incorporate it into your beauty routine?

8/6/11

Hair Tip of the Day: #9

Use a Clarifying Shampoo to Remove Conditioner Build-Up.


Most conditioners are designed to deposit a thin film of conditioning agents on your hair to reduce friction and add softness. These ingredients do not rinse completely away, however, even with the next washing. If you have hard water, it’s even more difficult to remove the residue.

To remove conditioner buildup, use a clarifying shampoo formulated with EDTA that can eliminate product-trapping minerals. For better results, use distilled water when you wash.

Not everybody experiences build-up, but if you do, you can also rotate plant oils and moisturizers like glycerin, honey, pureed banana and aloe vera gel with traditional conditioners. Washing with baking soda or using a diluted vinegar rinse can also help remove conditioner build-up.

via NaturallyCurly

8/4/11

Hair Tip of the Day: #8

Avocado is a natural moisturizer that helps hair growth.


Add avocado to a deep conditioner to make hair stronger, shiny and healthy. Avocado’s moisturizing essential fats make it an ideal fruit to use for hair repair. It leaves hair softer, more elastic and less prone to breakage.

via NaturallyCurly